Showing posts with label tutorial. Show all posts

Sunday, 1 January 2012

Free tutorial - little paper bird

 Hi to all my blogging friends...  Hope you all have had a good time over the Christmas holidays... 
I've decided to hit the new year running and get off to a good start by showing you all how to make a cute recycled paper bird like this one.
As some of you already know I love to recycle anything that would be otherwise be thrown away, I love to make it into something useful and beautiful.. And FREE!!! 
If you don't know, or haven't realised it yet.....I am a cheapskate...!

You will need: - 
Graph paper- Not essential.
Cereal box
Paper
Water based glue
Masking tape /sellotape
Paint,beads, lace, fabric, glitter etc to decorate.. 
*Just click on photo's to enlarge, copy and paste.
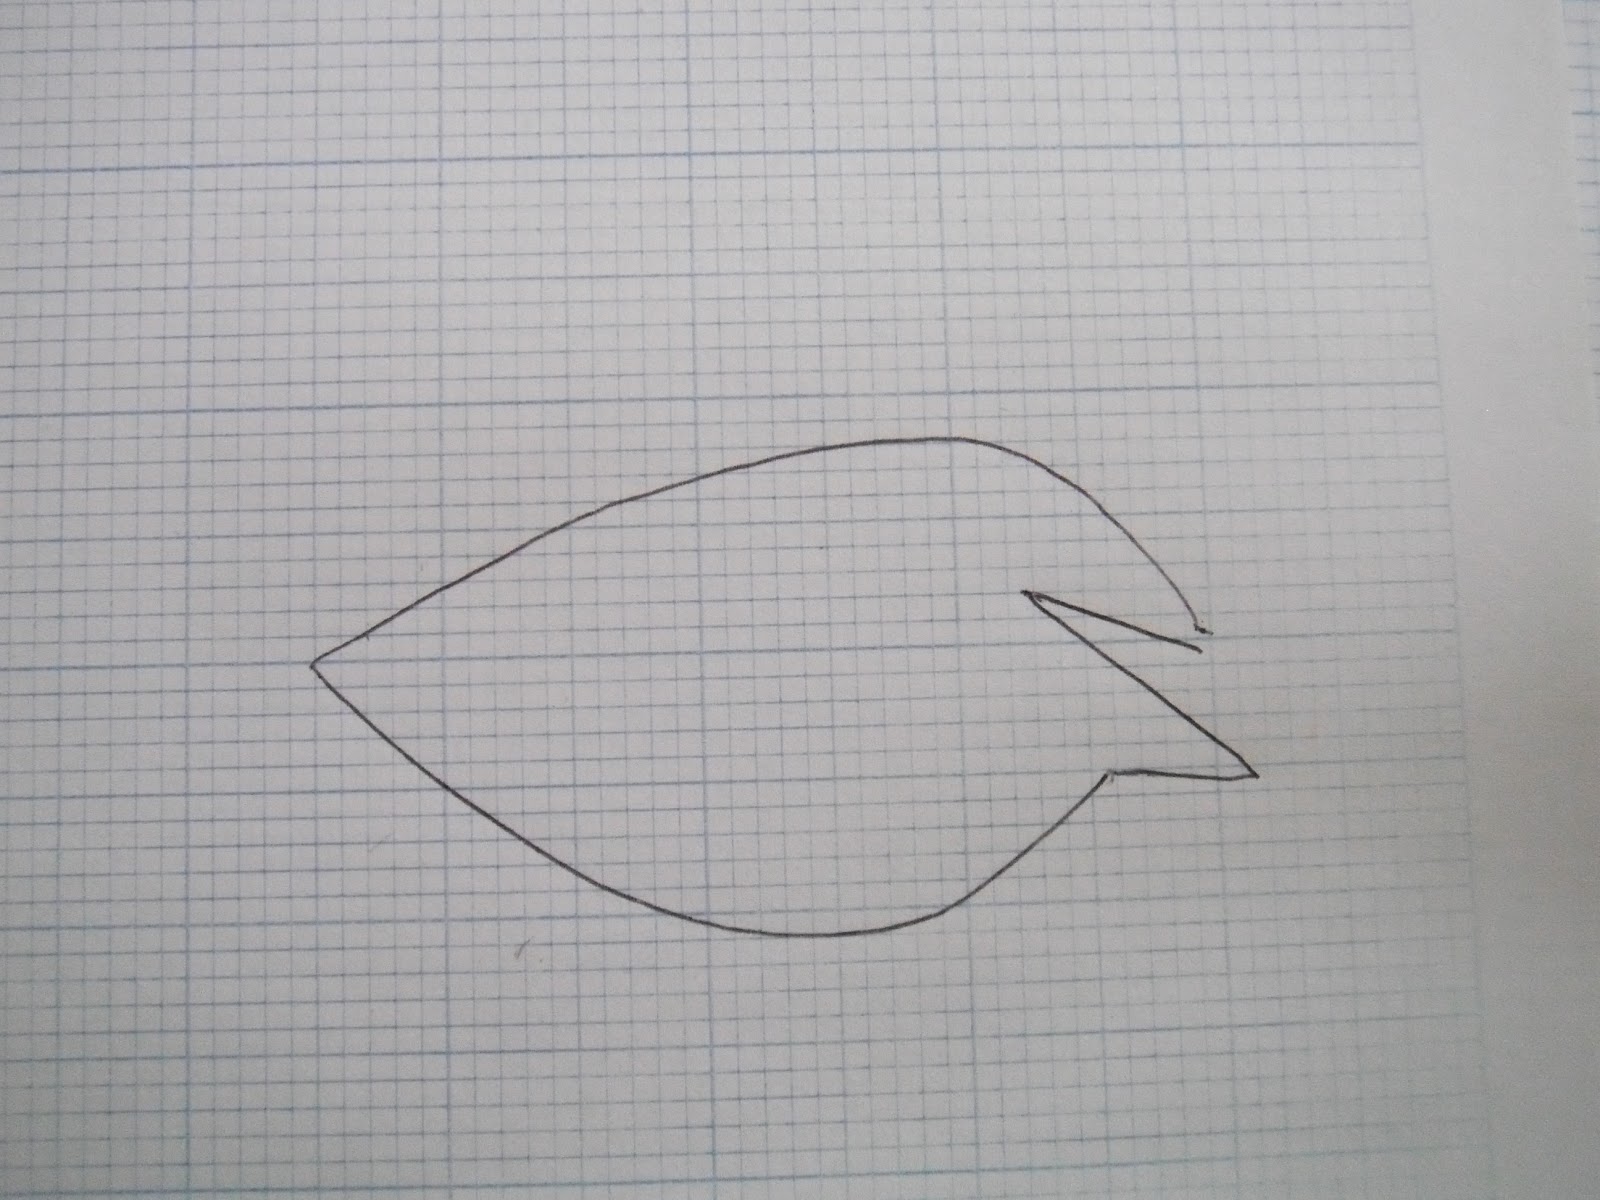
So you start with the pattern. Looks a little strange at them moment bear with me it works....
I am hoping that you will be able to print this off, if not just follow the pattern using graph paper.. You can in large it to any size as you can see mine are quite small about 3cm or so when finished..
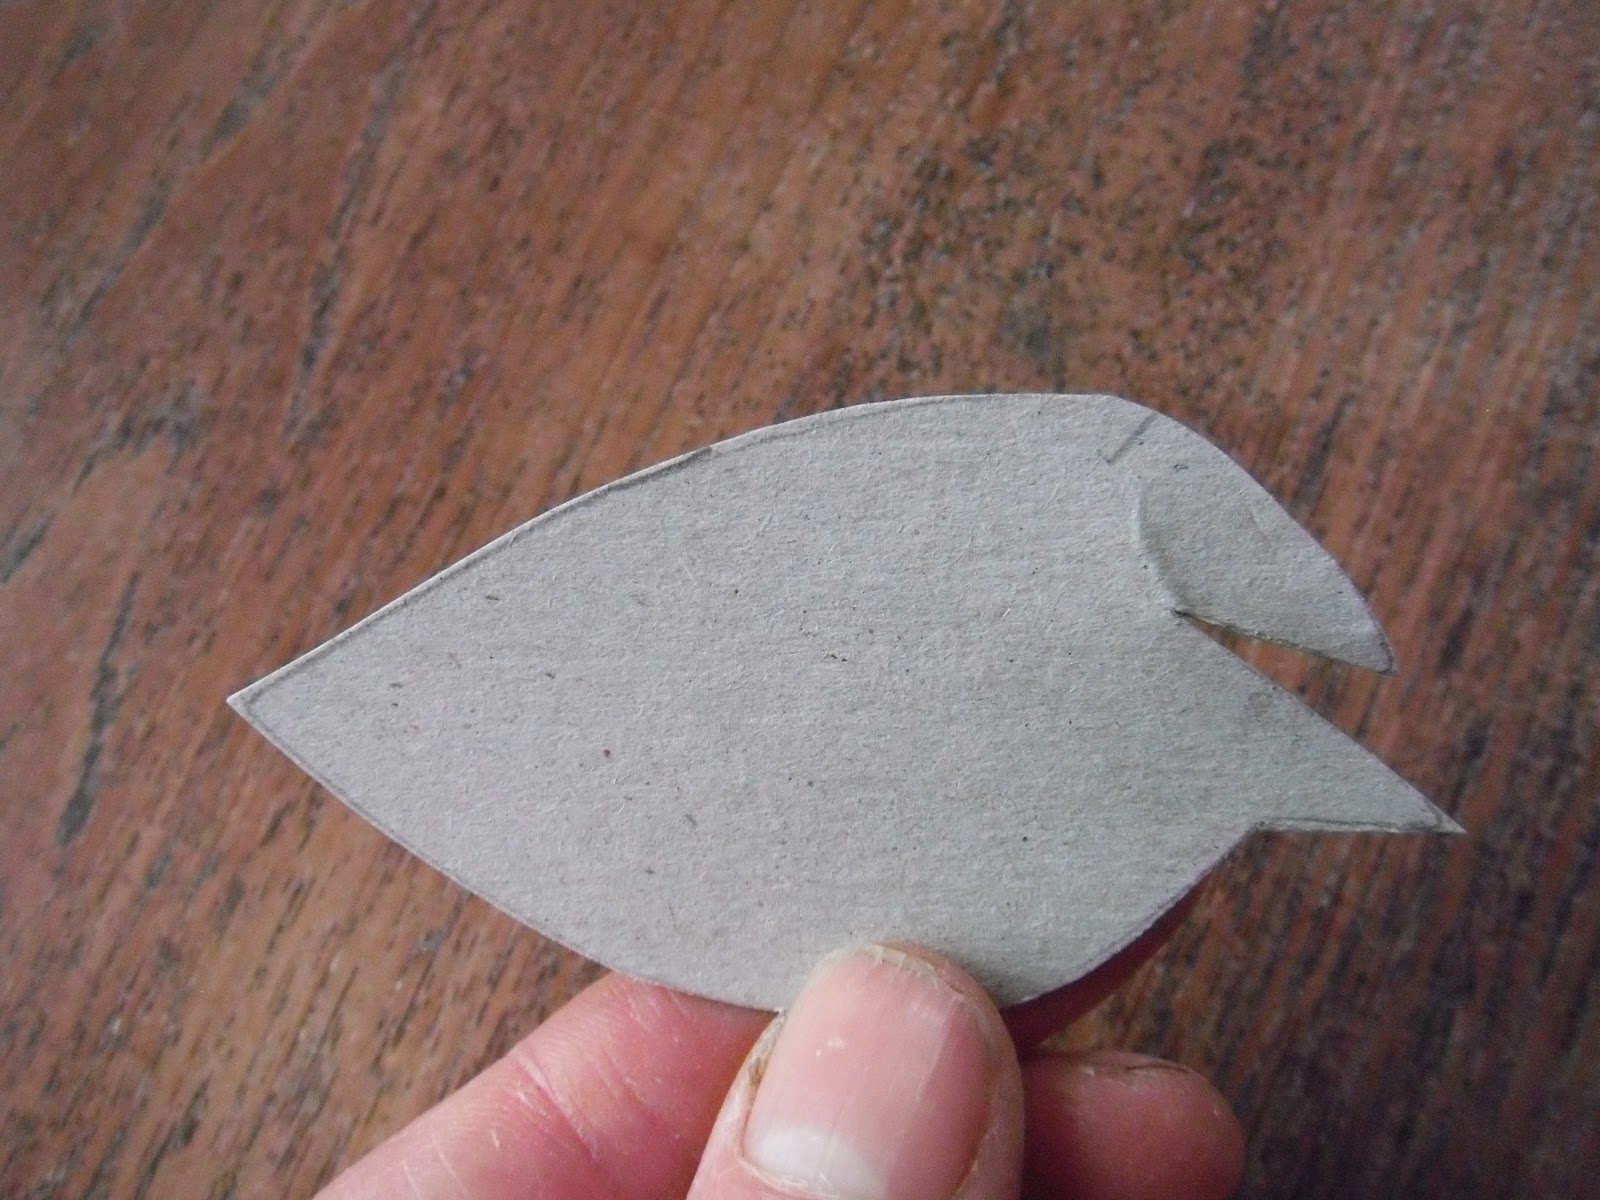
Transfer the shape onto... You've guessed it .. A cereal box. 
Cut out the shape x 2,
So... Here we go. The fiddly bit.
First of all to give the little bird shape you tuck the short beak piece under the longer piece and tape into place, do this on both halves. This gives the little fella a bit of an eye.. 
Then you tape both halves of the bird together. He should now have a bit of shape.
Tweak the two halves until they fit together and tape.
 
Then using any water based glue that you have to hand stick small papier mache strips all over the bird. I used an old hymn book that had seen better days... A 10p charity shop another bargain.
To finish make the little bird your own........I made them into robins as it was Christmas... I painted eyes and added a little flourish of colour and a sprinkle of glitter and he was done.. I used jewellers wire to hang him on our Christmas tree.. 

The possibilities are endless.. Easter chicks come to mind... If you make one or two, post them on your blog and I will link up with you to show everyone your amazing creations...
I made a few for our tree and gave the others to special friends over the Christmas holidays. They make fantastic little gifts and haven't cost you a bean..


WISHING YOU ALL HAPPY NEW YEAR OUT THERE IN THIS FUNNY VIRTUAL WORLD..  Julie.x

Thursday, 20 January 2011

Take...Collagraph journey with me .... A tutorial..

I have finally got around to finishing this tutorial, with one thing and another I just haven't got around to it.

It could all go wrong... but here goes..

'ROOK'
This is the story of one of my first collagraph prints...

It started with a rook in my garden.. I was so surprised to see it, needless to say no camera to hand.  So with a quick look on the internet I found a photo of a rook that I liked, printed it and traced it.
Then off to get samples of textured wall paper, you know the stuff.. the wallpaper that no one wants... I now have samples for the world, and cannot walk past a wallpaper aisle without taking a few samples .  I often wonder what the the staff think of me.....  'A wallpaper bag lady'   I wonder if they think that I decorate my walls with the stuff... Yuck!....... I think that I am doing the DIY shops a service, by taking some samples and recycling it... That is my story and I'm sticking to it.
Anyway, I diverse.... On a piece of stiff card I turned the rook over an placed the tracing on the card and re-drew the rook so that the drawing was transferred onto the cardboard.  Remembering that when it is printed the image will be reversed.


If you want to see how I made this collagraph plate just click on the link A collagraph tutorial or on the side bar  at  'Other places'.


I love doing collagraph but have so much to learn, If anyone has any advice, all is welcome, I appreciate all the help I can get.

If on the other hand anyone would like to ask me a question please just ask.

Thursday, 4 November 2010

A quick tutorial ...

WOW!.....I like it...
RECYCLE an old shoe box.. 
...into a good strong storage container
(Not much of a tutorial more of an idea really)
Times are hard and money is short... and I need some new storage boxes for my studio which is coming along nicely.  I want something for nothing, so off to the local shoe shop to get some 'FREE' boxes... Most shoe shops have hundreds that they have to throw out every day, and are glad to get rid of some... so just ask.
 First take your shoe box
 An old copy of the 'Yellow Pages'...NOT the one being used... Although I was tempted...
I like the colours of the 'Yellow pages' and the paper is nice to work with... and it is what I had to hand...If you haven't got one use an old newspaper will do just fine.
Make up a jar of cold water wallpaper paste and leave to 'gel'. I use an old jam jar because you can put on the lid and shake it rather than messing about stirring the glue, then when you have finished just pop the lid back on to keep it fresh.
Randomly rip up the Yellow Pages... or newspaper, biggish pieces.
We want to be quick.
 Paste the inside of shoe box it sticks better if you paste the box first
Take a large piece of your torn paper and glue it
Stick it to inside of your shoe box
 Add more pieces overlapping as you go. Press the pieces into the joins of the box with the brush......Use the brush to smooth out any lumps or bumps.
Continue gluing pieces of the torn paper to the inside of the box
Continue until you have covered all of the inside of the box and up the sides.
Leave the base for now so that you can dry it without getting it stuck to your work surface....using the same process, cover the inside of the lid. Dry thoroughly....
Now do the same to the bottom of the box and the top of the lid.... Leave to  dry completely....over night is best.
Check over the box and lid to see if you've missed any bits... If completely covered your storage box is now ready to use..The papier mache has made it strong and it no longer looks like an old shoe box.
Add a label and pop in your bits and bobs.....

Only another err.. 20 or more to go...... Hey, I've got a lot of stuff!

 Now what can I put in these boxes... humm... paper, lace, ribbons, pencils...found bits and bobs, I now have a place to put them and not loose them.

And another good point shoe boxes come in all sizes....
Endless possibilities.. coloured pencils, tools, inks, paint tubes, A make up box, Christmas wrapping,  the list goes on... So get your children and grandchildren gluing and sticking.... And better still tidying up all the stuff that you have lying around the studio and house..

Have fun.

*Note to self...Must remember to put labels on the boxes otherwise I still won't be able to find the stuff...